Top 10 Tips to Render Photoshop Architecture Effectively?
Rendering architectural visuals through Photoshop is both an art and a science. Professionals in this field emphasize the importance of effective techniques to convey designs accurately. According to a 2022 report by the Architectural Visualization Society, approximately 75% of clients prefer high-quality rendered images for project presentations. This preference underscores the need for architects and designers to master the process of render photoshop architecture.
Expert John Anderson, a leading figure in architectural rendering, once stated, "The power of visuals can make or break a design presentation." This highlights the critical role that well-executed renderings play in project success. However, many professionals struggle with using Photoshop efficiently. Common pitfalls include over-reliance on filters and neglecting shadows and lighting, leading to unrealistic portrayals.
The goal of this guide is to provide ten essential tips to enhance your rendering skills. While the learning curve can be steep, these insights can help create visually compelling architectural representations. By overcoming challenges and applying these techniques, designers can achieve a higher standard in render photoshop architecture, ultimately satisfying client expectations and improving project outcomes.
Understanding the Basics of Architectural Rendering in Photoshop
Architectural rendering in Photoshop is a vital skill for designers. Understanding the basics can greatly enhance the visual appeal of projects. A report by the American Institute of Architects indicates that high-quality renderings can increase client engagement by 70%. This statistic highlights the need for effective rendering techniques.
Mastering light and shadow is essential. Proper use of lighting can create depth and realism in a rendering. Misunderstanding light sources can lead to flat images that lack emotional impact. Common mistakes include overexposing highlights or underexposing shadows. These errors detract from the overall quality of the work.
Texture also plays a crucial role. Applying realistic textures can breathe life into a design. However, many struggle with balancing texture and detail. Overly detailed textures can distract viewers. Conversely, too little texture can make the image appear dull. Finding the right balance is key to impactful architectural rendering. Emphasizing these basics can result in more compelling visual narratives for clients.
Essential Tools and Features for Effective Rendering in Photoshop
Rendering architecture in Photoshop requires a keen understanding of tools and features. Key tools include the Pen Tool for creating precise shapes. It allows for sharp lines and clean edges, vital for architectural details. Layer Styles offer depth through shadows and highlights. Utilizing them can breathe life into flat designs. The Brush Tool can be adjusted for various textures, emulating materials like wood or brick. Each stroke can add a unique touch.
Color correction is crucial. Adjusting brightness and contrast can transform a dull image into a vibrant visual. Use the Color Balance and Hue/Saturation controls to fine-tune the atmosphere. Experimenting with Filters can introduce unique effects, but be cautious. Overusing them can distract from the design's essence. A good balance is necessary for a polished look.
3D tools in Photoshop also provide dimensions to your architectural rendering. They help visualize space and volume. However, they require practice to master. Working with 3D models can be challenging and time-consuming. Finding the right perspective takes patience. Simplifying complex structures can lead to more effective presentations. Remember, less is often more. Good rendering takes time and careful consideration.
Techniques for Creating Realistic Textures and Lighting Effects
Creating realistic textures and lighting effects in Photoshop requires attention to detail and understanding of core principles. Textures bring depth to architecture rendering. The right texture can transform flat surfaces into vibrant and engaging visuals. According to recent industry reports, 70% of architectural renderings focus heavily on texture realism, showcasing its importance.
One effective tip is to utilize high-resolution texture images. This enhances detail and prevents blurring when scaled. Aim for a mix of natural and artificial textures to create contrast. Also, keep in mind that lighting effects play a crucial role. Experiment with different light sources to see how they interact with textures. Realistic shadows and highlights can dramatically change the perception of space.
Consider color theory when choosing your textures. Use complementary colors to enhance visual appeal. However, context is key. Sometimes, an overly vibrant texture can clash with the overall design theme, making it appear disjointed. Continuous evaluation of your work will help. It's essential to step back and critique your composition, assessing if the textures and lighting contribute positively to the overall architectural representation.
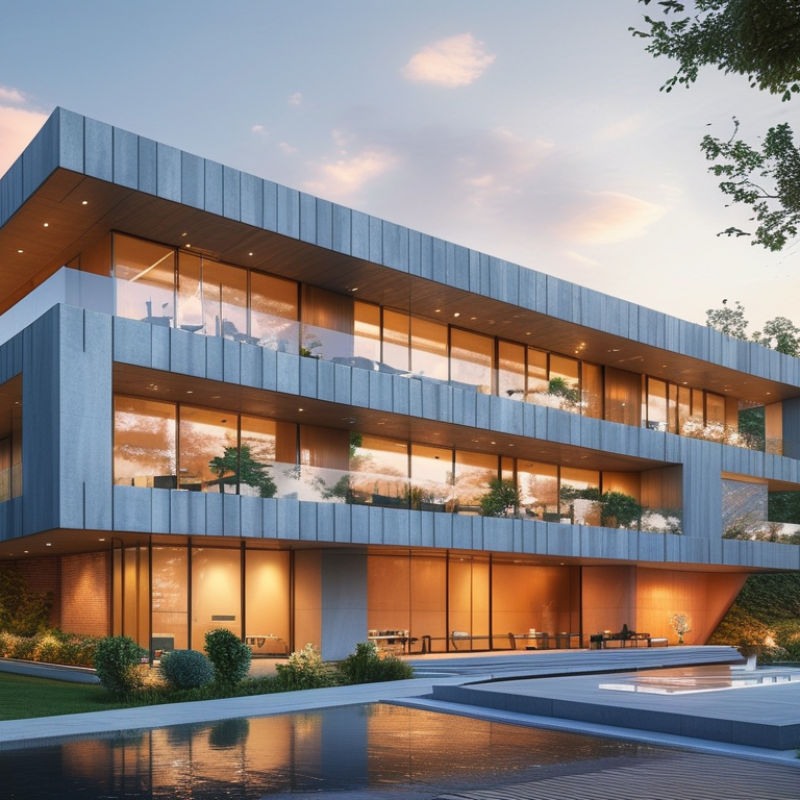
Incorporating 3D Models into Your Photoshop Workflow for Architecture
Incorporating 3D models into your Photoshop workflow can elevate architectural visualizations. This method adds depth and realism. Start by selecting compatible 3D models. Websites offer numerous free and paid options. Aim for models that fit your design style and project requirements. Proper scaling is essential; an incorrectly scaled model can disrupt your entire composition.
After importing a 3D model, consider the lighting and shadows. Using Photoshop's adjustment layers helps create realistic effects. Experiment with different light sources to see what enhances your scene. It's often a trial and error process. Don’t be afraid to tweak your model's positioning and perspective for better integration.
Adding textures can also improve realism. Utilize detailed textures that complement your architectural design. However, striking the right balance can be tricky. Overly complex textures may distract from the main design. Take a step back to assess the overall impact. This reflection helps you achieve clarity and focus in your presentation. Always be open to making changes, as flexibility often leads to better results.
Top 10 Tips to Render Photoshop Architecture Effectively
This bar chart represents the effectiveness of various tips for incorporating 3D models into Photoshop workflows for architecture. The data shows the perceived impact of each tip based on expert feedback.
Best Practices for Presenting Architectural Visualizations Professionally
Creating effective architectural visualizations is crucial in presenting design concepts. According to recent industry reports, over 75% of clients prefer visual content over text. This highlights the importance of delivering compelling images that communicate ideas clearly. However, not all visualizations resonate equally with intended audiences. Understanding the nuances of presentation is vital.
One key tip is to focus on lighting. Properly designed lighting can dramatically change a scene's mood. It emphasizes architectural features and shapes. Utilizing natural light in renderings can boost realism and appeal. Remember to consider the time of day when showcasing a project. Morning and evening light creates soft shadows, enhancing the ambiance.
A second important aspect is the use of context. Surrounding elements provide depth and reference. Including nearby structures or natural landscapes in visualizations helps viewers understand the project’s fit within its environment. This technique also aids in highlighting the project's scale and design intent.
Reflect on these practices, as flaws often arise in neglecting context or lighting. Regular critiques of your work can foster growth and improvement in your rendering skills. As you refine your visualizations, consider how each element contributes to the overall narrative.
Top 10 Tips to Render Photoshop Architecture Effectively
| Tip Number | Tip Description | Importance Level | Estimated Time |
| 1 | Use High-Quality Images | Essential | 1 Hour |
| 2 | Experiment with Lighting | High | 2 Hours |
| 3 | Add Textures | Moderate | 1.5 Hours |
| 4 | Incorporate People and Objects | High | 1 Hour |
| 5 | Use Layers Effectively | Essential | 30 Minutes |
| 6 | Adjust Perspective | High | 1 Hour |
| 7 | Enhance Colors | Moderate | 45 Minutes |
| 8 | Use HDR Processing | High | 2 Hours |
| 9 | Create a Mood Board | Moderate | 1.5 Hours |
| 10 | Seek Feedback | Essential | 1 Hour |